Creating Your First Screen
Designing with Screens
Teaser
At the end of this topic you will have a screen with an interaction. When the user hovers the mouse cursor over a region of the screen, a menu is displayed to the right of the screen.
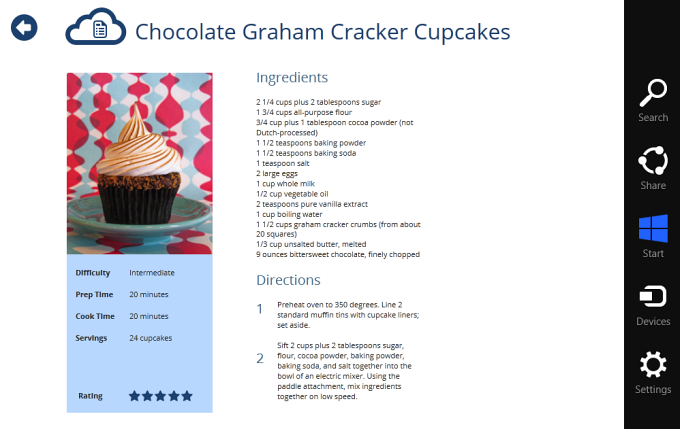
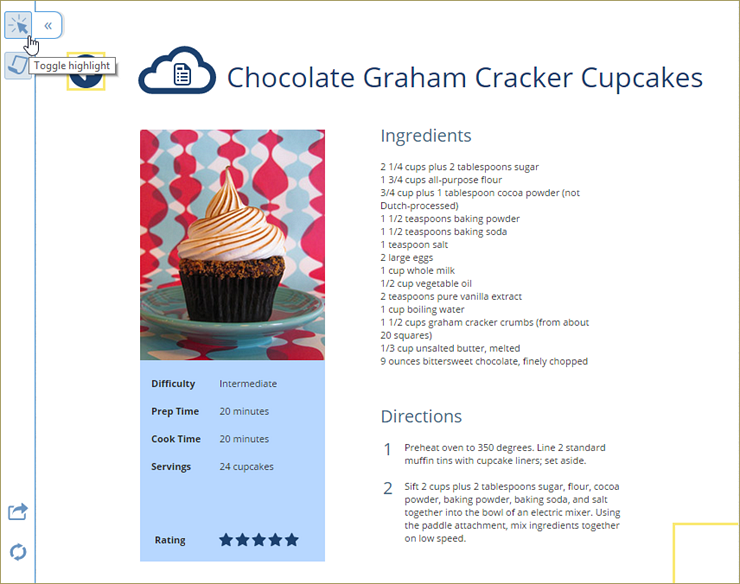
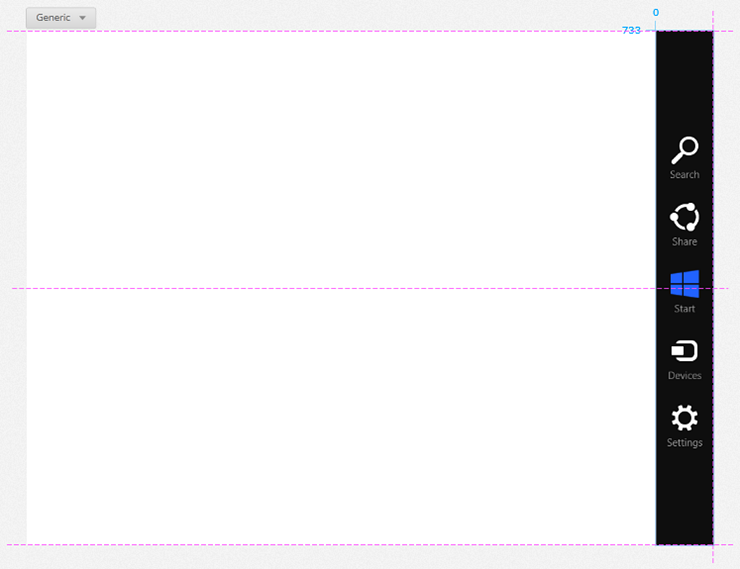
The image below shows an example screen, available in the RecipeLater prototype, which you can find on cloud.indigo.design.
In Brief
These are the main steps of the procedure:
- Creating a new screen.
- Adding elements to the screen.
- Adding an interaction.
- Making changes to the new state.
- Saving your screen.
- Running the screen preview.
Step by step
(a-1) 1. Create a new screen.
In the
Application Menuclick theStart a New Projectbutton in theOpen/Newpane.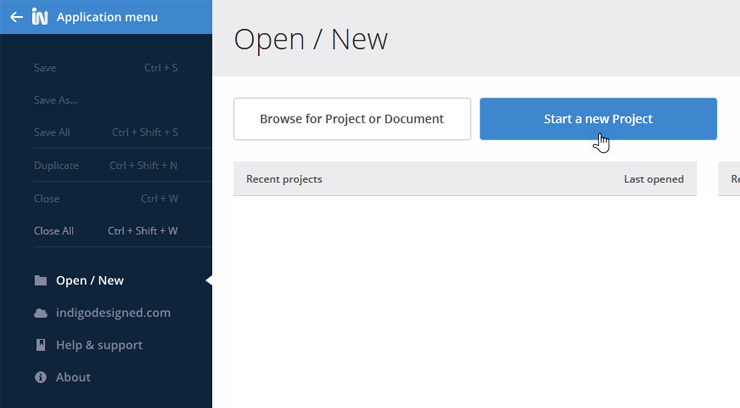
Select the
Screenoption.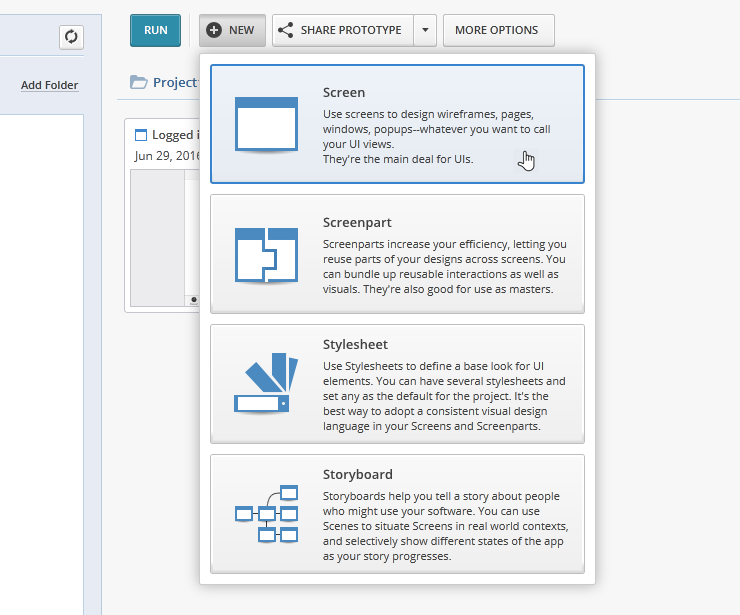
Indigo creates a new blank screen for you. By default, the viewport is set to Generic, but you can choose any of the other options in the
Platform Picker.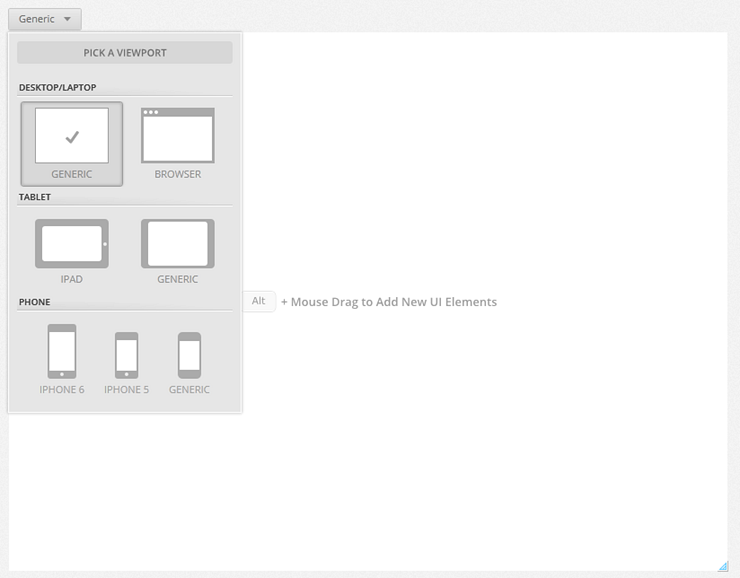
Once you've selected the viewport, you can change the canvas size and background color using the
Platform Properties Panel. For this example, use the default, Generic viewport.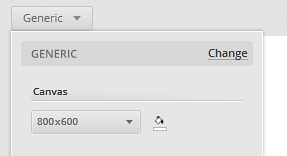
You can also resize the canvas by dragging from its bottom right corner.

For more information on choosing a viewport and resizing the canvas, see Targeting Platforms and Screen Sizes.
(a-2) 2. Add elements to the screen.
Click on the designer and press the Alt key at the same time.
A textbox appears prompting you to type the name of an element.
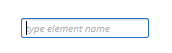
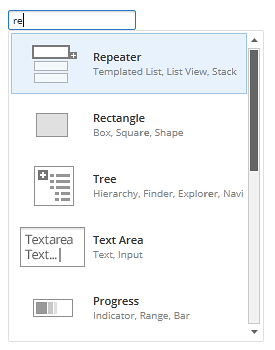
Type the word rectangle in the textbox.
As soon as you start typing, several options will be displayed. You can continue typing to narrow your search. The highlighted option is the one selected when you hit Enter.
 You can also add an element to the screen by dragging it from the Toolbox.
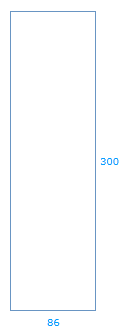
Drag to resize the rectangle.
The number of pixels displays on the sides of the rectangle as you drag it. Drag until it's the same height as the screen and 86 pixels wide.
Change the background color.
As soon as you stop dragging the
Properties Panelappears. Use the color picker to change the background color of the rectangle to black.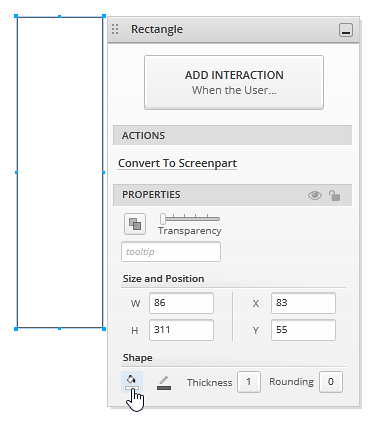
Move the rectangle.
Use the snap lines to center the shape and to place it to the right, outside of the screen canvas. This way, it won't be visible at first.
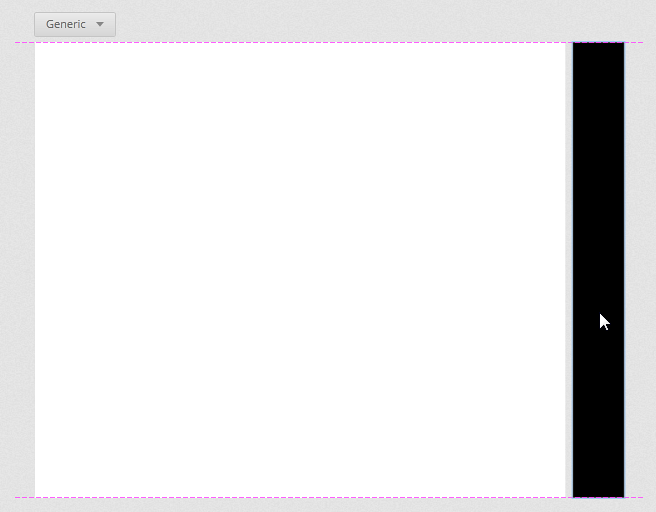
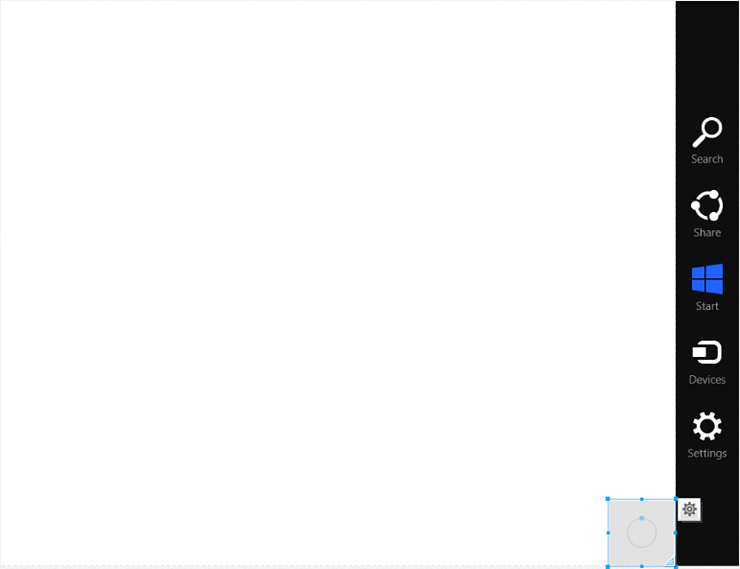
Add icons and text.
You need some icons or images with text beneath them to complete the menu. If you want high visual fidelity, you can use an image of the whole menu with hotspots like the one in the example prototype. But if you are looking for quick results, the icons available in Indigo may come in handy.
Group the elements.
Select the rectangle, the icons and text and press CMD/CTRL+G, or use the
Group Theseaction in theProperties Panel.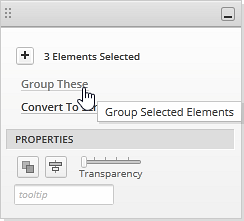
Your menu is ready!
(a-3) 3. Add an interaction.
Add a square hotspot in the bottom right corner of the screen.
Hotspots are screen elements used to define special interactions. To see hotspots with defined interactions in the prototype viewer, toggle highlighting interactions.
Select the hotspot and click the
Add Interactionbutton in theProperties Panel.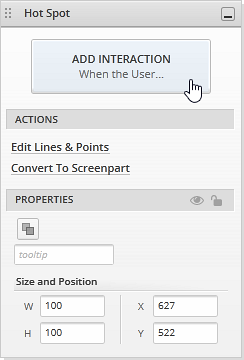
Select the
Hovers Overoption from theWhen Userselection list.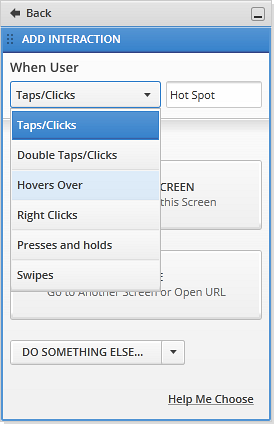
Click the
Change this Screenbutton.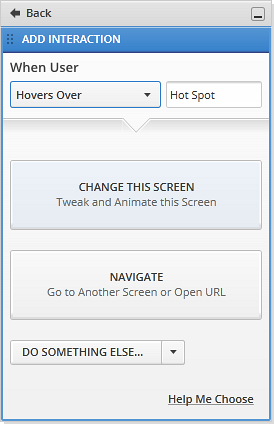
Click the
To New Statebutton.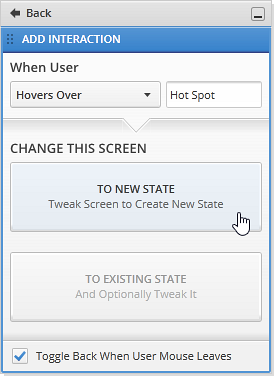
A new state is created for your screen. For more on this, see Adding Your First Interaction.
(a-4) 4. Make changes to the new state.
Move the menu group. Use the snap lines to make sure it's centered and aligned with the right side of the screen.
(a-5) 5. Save your work
Right-click the
Document Tab.The context menu appears.
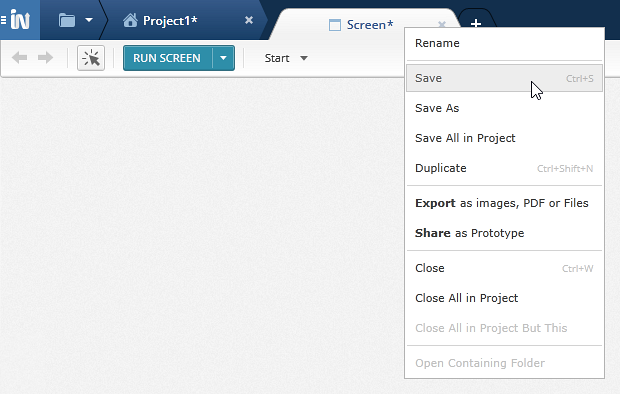
Select the
Saveoption.The
Savedialog appears.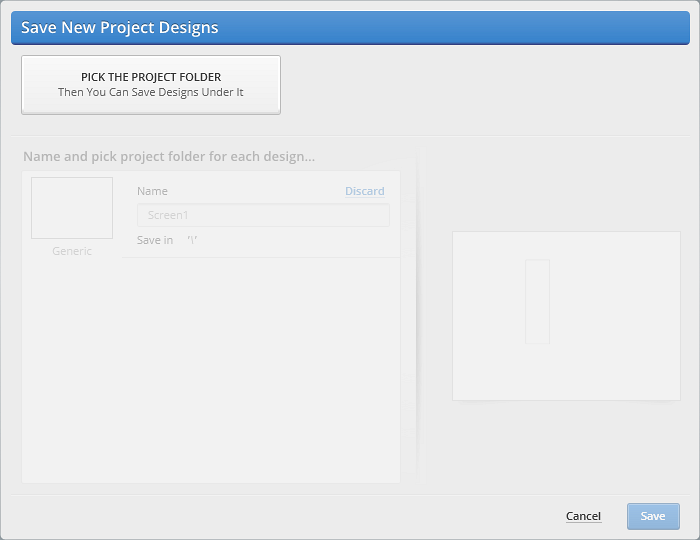
Select the project folder or create one.
Click the
Savebutton.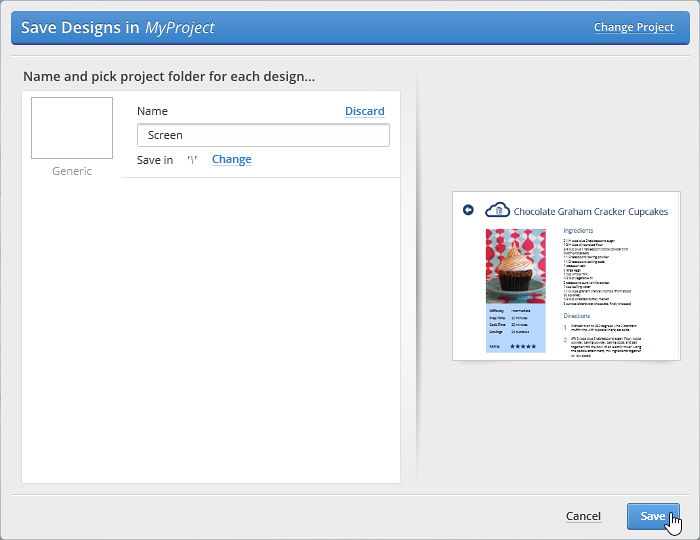
You can choose to change the name of the screen at this point.
(a-6) 6. Run the screen preview.
Click on the Run Screen button at the top of the designer.
The preview opens in a new window. When you hover the mouse cursor over the bottom right corner of the screen, the menu appears. You can leave the preview window open and hit refresh to update changes as you make them in the designer.

You can use the toolbar on the left of the Prototype Viewer to restart the prototype, highlight interactions, and show or hide annotations. By default, interactions are not highlighted and notes are displayed. For more, see Viewing Your Prototypes.
The RecipeLater sample shows this as an animated change. To learn about how to animate an interaction, see Adding Animations to Your Interactions.
Learn More
Here are some suggested topics: