Creating Your First Prototype
Indigo Studio basics
Teaser
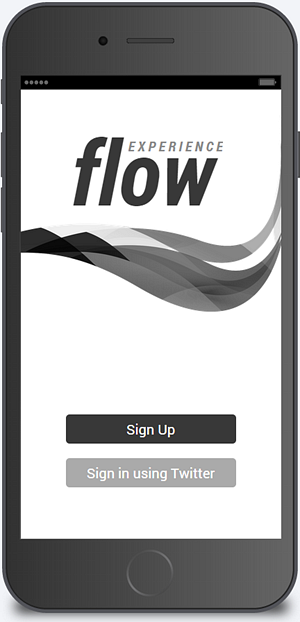
At the end of this topic you'll have a prototype for a mobile app sign-up experience. After the user signs up, a success message appears. The user can then navigate to the content area of the app.
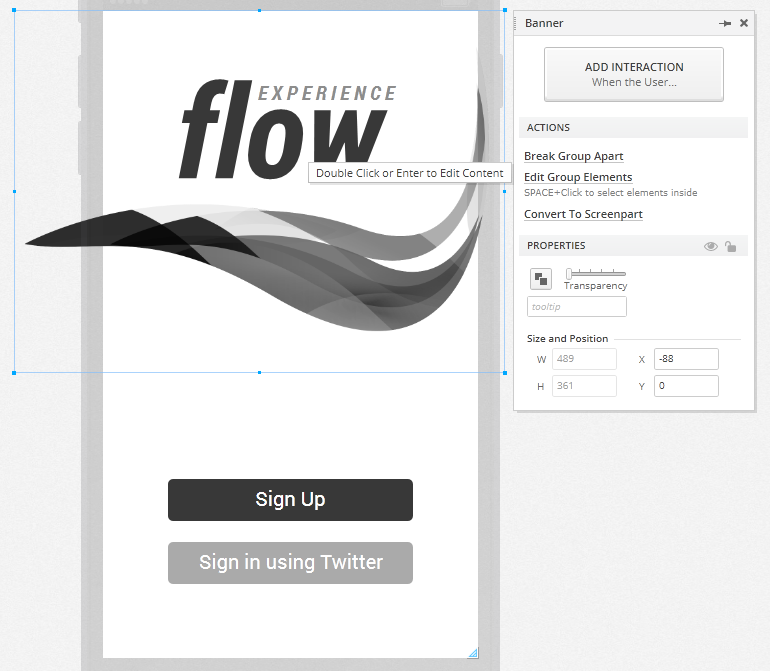
The image below shows an image from the Experience Flow prototype, which you can find on cloud.indigo.design. Also, check out our video on how to build this prototype!
In Brief
These are the main steps:
- Creating a new project and screen.
- Adding the sign up interaction.
- Adding the submit interaction.
- Adding navigation to another screen.
- Sharing the prototype.
Step by step
(a-1) 1. Create a new project and screen.
In the
Application menuclick theStart a new Projectbutton in theOpen/Newpane.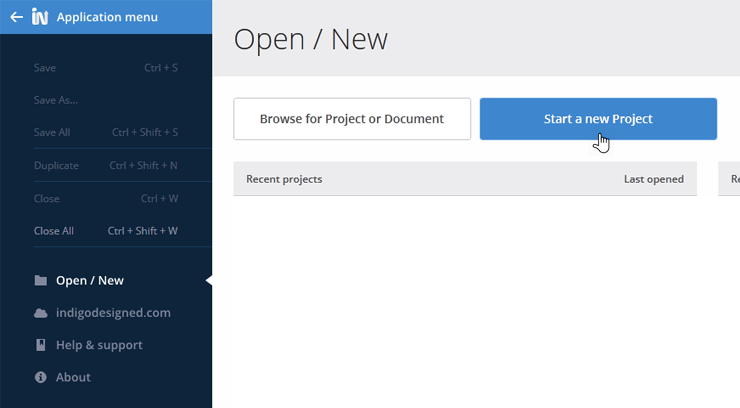
Indigo creates a new empty project and takes you to the
Project Home.Select the
Screenoption from the dialog.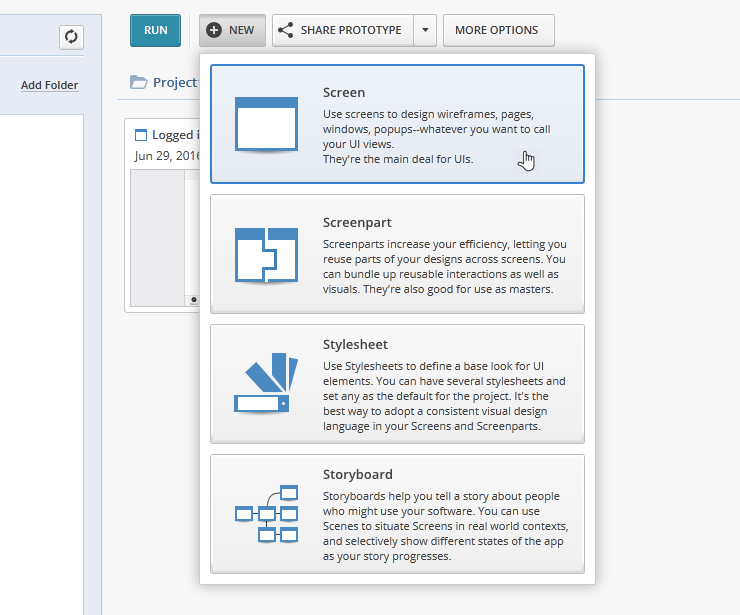
Indigo creates a new blank screen for you. By default, the viewport is set to Generic.
Choose the iPhone 6 option from the
Platform Picker.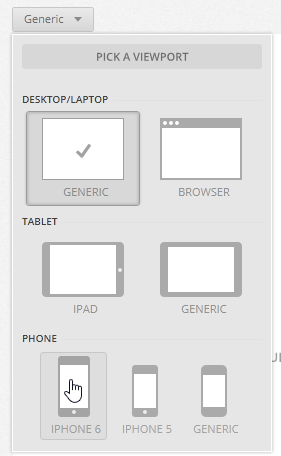
Add elements to the screen.
Use the
Toolboxto drag and drop elements or Alt + click on the designer and then type the name of the element you want to add in the textbox.To follow this example, add Sign up and Sign in using Twitter buttons and an image.
 Use **Alt + click** or **Alt + drag** to quickly add elements. This way you can hide the toolbox and have even more design space!
(a-2) 2. Add the sign up interaction.
Select the Sign up button and click
Add Interactionin theProperties Panel.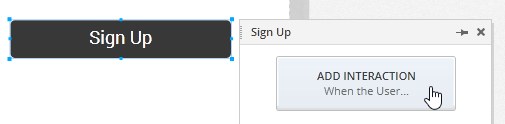
Leave the default
Tapsoption from theWhen Userselection list.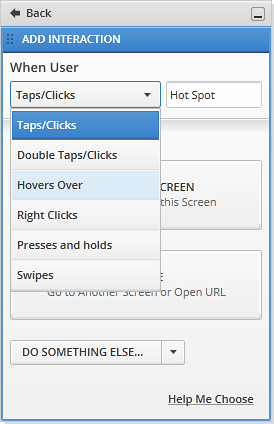
Click on
Change this Screenand then onTo new State.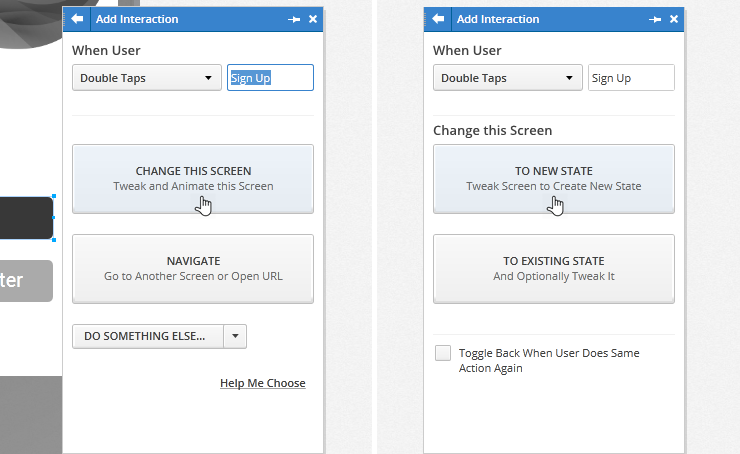
You've created a new state for your screen. Now you need to make the changes that the user action causes in the screen.
In the new state, add a Container Box for the sign up form. Place it so that it covers the sign up and sign in buttons.
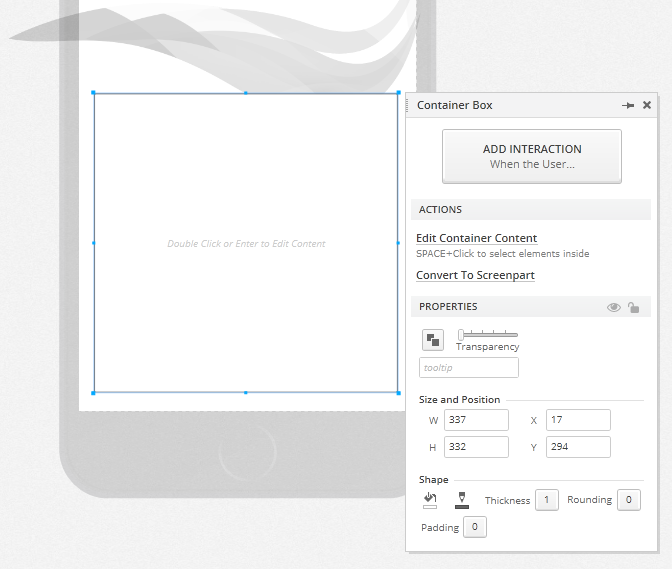
Double click the container to edit its content and add the form elements.
To make it like the one in the example add a close icon, 3 textboxes for the account details, a button, and a text.
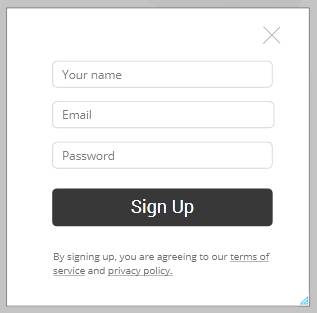
Add transparency to the image. You need to exit the container edit mode first.

Animate the changes.
In the
Timeline, drag the Add and Set opacity actions to give them a duration.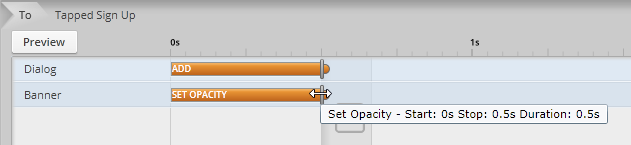
Both actions, the dialog appearing and the image becoming more transparent, will happen gradually.
(a-3) 3. Add the submit interaction.
Add a tap interaction to a new state on the Sign up button in the container. This creates another state for this screen.
Move or remove elements to make room for the success message. Anything outside the canvas area won't be visible when you run the prototype.
Add some elements to communicate the success of the sign up process and a Continue button.
Add duration to some of the actions using the
Timeline.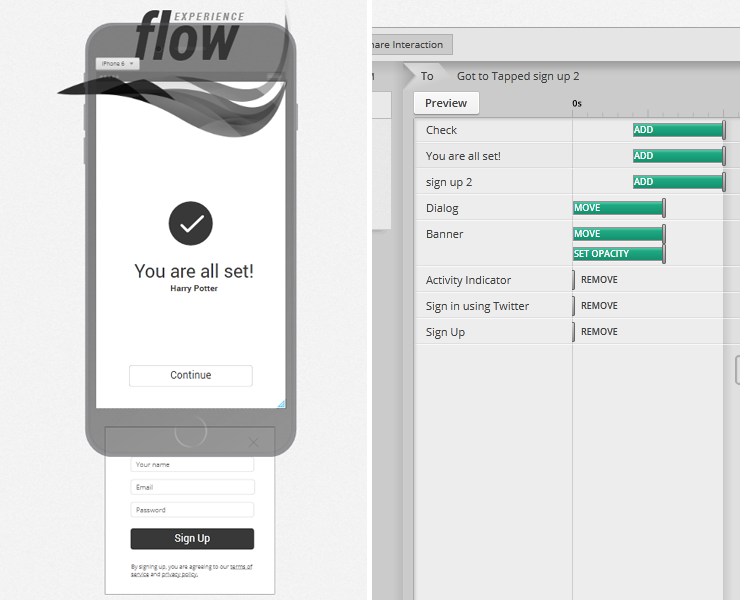
(a-4) 4. Add navigation to another screen.
Add an interaction on the Continue button. This time, instead of creating a new state, choose Navigate to Screen in project.
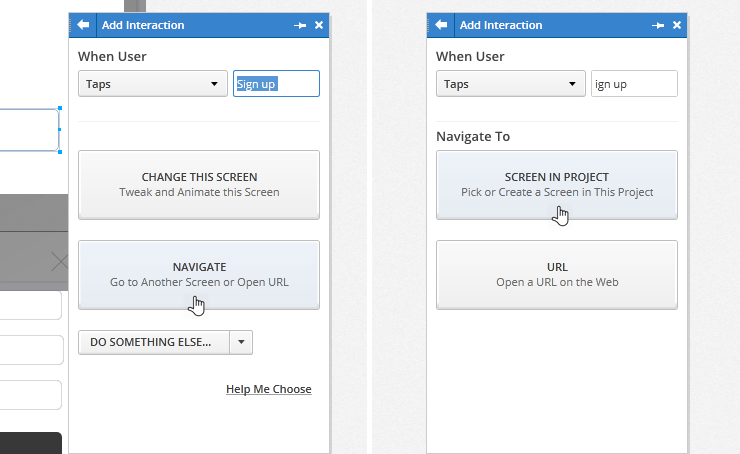
If the other screen doesn't exist, you can create it now, from inside the picker. This screen will show the app content, what the user sees after signing in.
(a-5) 5. Share the prototype.
Click on the
Share prototypebutton in theProject Hometo publish on cloud.indigo.design.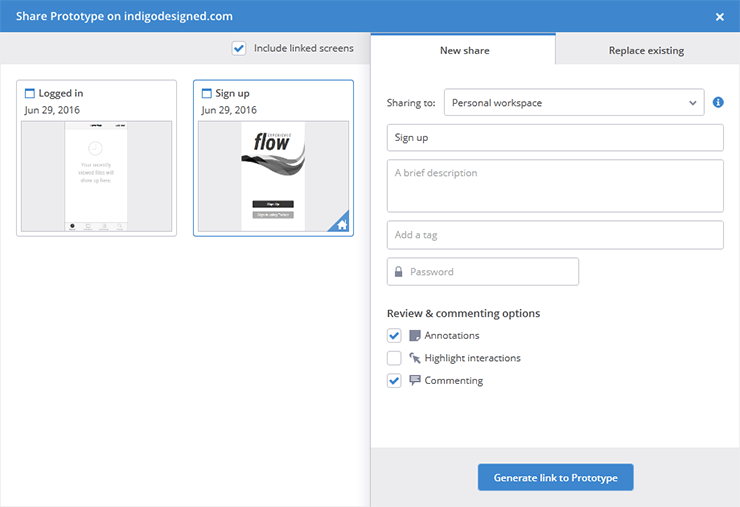
Share the generated link with your reviewers. They can view the prototype from device, no need for installs!
Learn More
Here are some suggested topics: