Organizing Screenparts
Designing with Screenparts
Overview
Screenparts are available from the Screenparts tab in the screen designer Toolbox. This is where you manage categories to keep your screenparts organized.
In this topic you will learn how to work with screenpart categories in Indigo Studio:
- Adding a category to a screenpart.
- Removing a screenpart from a category.
- Renaming a category.
- Removing a category.
To read about how to export the screenparts in your project, see Exporting Your Designs.
(a-1) Adding a Category to a Screenpart
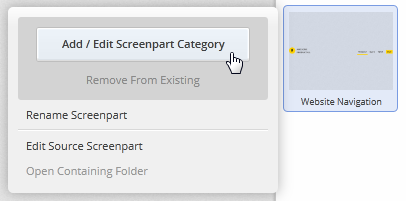
Right-click on the screenpart in the
Screenpartstab of theToolbox.Click on the
Add / Edit Screenpart Categorybutton.
- Type a category name and click on the
Donebutton.

The Screenparts tab in the Toolbox now shows the screenpart under the category you've just created. Once you have at least one category, Indigo will list the screenparts with no categories in an Uncategorized section.

You can add more than one category to a screenpart, using the same steps.

Screenparts with more than one category are listed under every category they belong to.
(a-2) Removing a Screenpart from a Category
Right-click on the screenpart in the
Screenpartstab of the Screen designerToolbox.Click on the
Add / Edit Screenpart Categorybutton.Uncheck the category for that screenpart and click on the
Donebutton.

This way you can add or remove a screenpart from several categories at the same time.
Alternatively, you can right-click a screenpart in one category and click on Remove From Existing. This will only remove the screenpart from that category.

(a-3) Renaming a Category
Double click on the category name in the Toolbox and type the new name.

(a-4) Removing a Category
Click on the Remove link.

Learn More
Here are some suggested topics: