Understanding Screen Interactions & States
Working with interactions
Overview
A hugely important concept in Indigo Studio is the screen interaction flow model, which is how interactions cause changes to the screen and how those changes are shared/flowed across states. To really master Indigo, having a good understanding of this is invaluable.
In this topic you can find information about:
- The Interactions Explorer
- What Is a Screen Interaction?
- What Happens When You Add an Interaction?
- What Do You Need to Know about States?
(a-1) The Interactions Explorer
When you create a new screen or screenpart in Indigo, you might notice a dropdown button at the top of the designer.
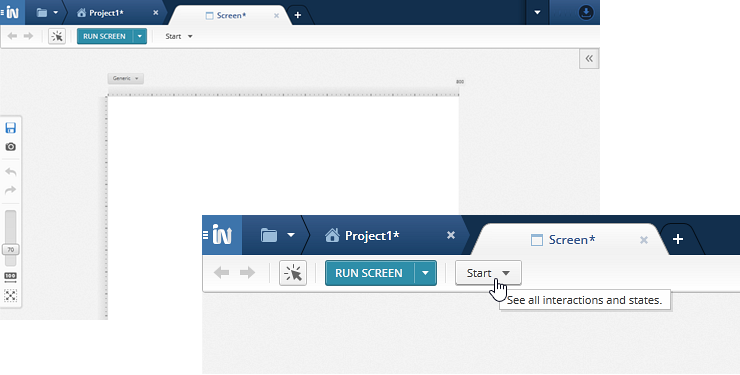
This is your entry point into the Screen Interactions Explorer—a helpful tool to both visualize your interactions as well as to navigate them. Clicking this drop down by default will show the Mini Interactions Explorer, which is a handy way to navigate between interactions. On a screen that has no interactions defined, it will just show one little box. Clicking the expand/full screen button will expand to the full Interactions Explorer, and you'll see something like this in the main area:
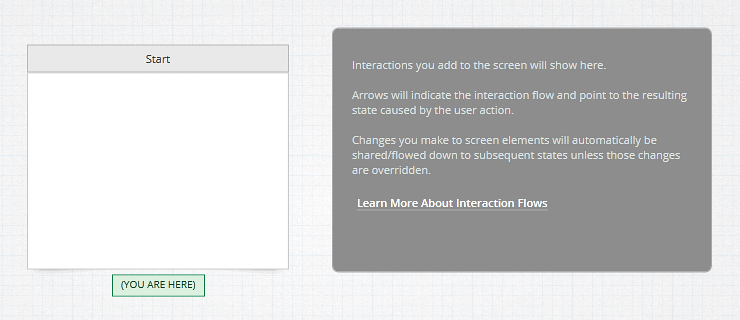
Once you have added at least one interaction, you will see that screen's interaction flow start to build itself out.
(a-2) What Is a Screen Interaction?
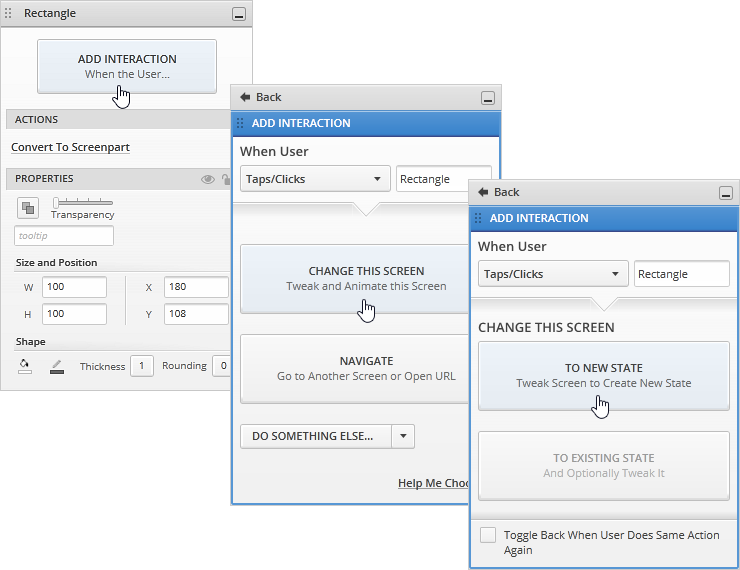
In Indigo, we define interactions to mean a combination of three things (in this order):
User Action
Some input provided by a user, typically through input devices. The most common of user interactions is clicking/tapping. User interactions are sometimes called triggers or events.Screen Changes
Changes to the screen that occur in response to a user action. In Indigo, these are recorded on the Timeline in the Transitions/Animations panel at the bottom of the screen designer.Resulting State
After the changes are applied, the screen has a new state. This state is a starting point for further user action, which can trigger more changes, resulting states, and so on—all working together to create an interactive prototype.
The result of an interaction can also be to go to a different screen or even to open a URL. But we are focusing on in-screen interactions here to explain screen interaction flows.
(a-3) What Happens When You Add an Interaction?
You can add an interaction to pretty much any element. If you choose to change the current screen as a result of the interaction, Indigo creates a new state in the flow.
When you add an interaction that results in a new state, you will see the Mini Interactions Explorer show you where it was added. It also automatically opens the newly created state so that you can design the changes for it right away.
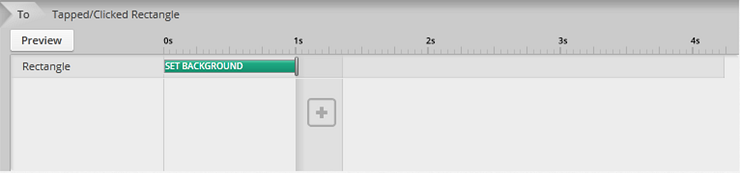
As you make changes to the screen, you'll see actions added to the timeline. You can drag these actions out and/or resize them—this creates animations, which are essentially making changes over time (instead of immediately).
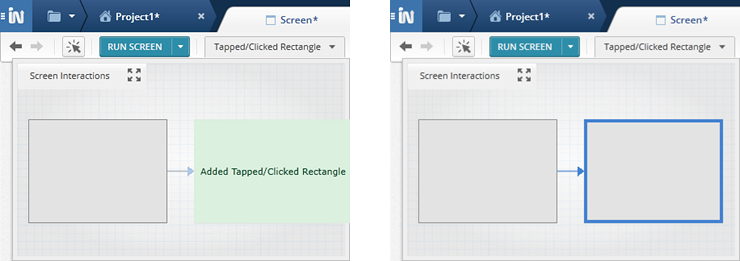
Once you make some changes, open the Screen Interactions explorer again. Now you'll see something like this:
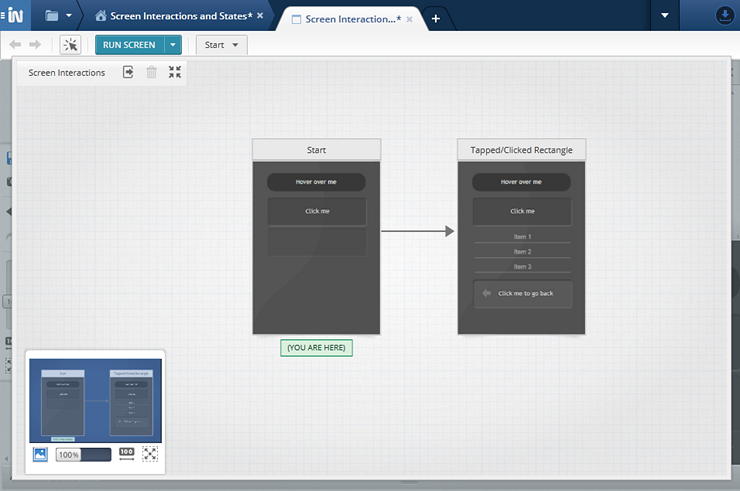
See how the flow diagram is growing? There are now two boxes and an arrow connecting them. The first box is the Start state (the default initial state that all screens get for free) and the new box, which is the result of the interaction you just added. Note how you see the change from one state to the other—the elements you added or changed when designing the new state are shown in its thumbnail.
If you hover your mouse over a state, you will see more info about it, including the user action(s) that trigger the changes represented there. Selecting a state will keep this extra information showing for it until you click off of it—this lets you pan around to explore and understand the interaction and change flow. Double-clicking a state will let you edit it.
(a-4) What Do You Need to Know about States?
Here's a key piece of information. Each new state builds upon the previous state. That's because a new state is simply the result of applying changes to the state it's based on, in response to some user action. Think of it like when you are editing a document. The original document is the Start state, and then after that, subsequent revisions to it only override what was in the original. Similarly, when you make changes to a screen in a new state, you are only overriding (or adding to) what was there before—these are changes, and we show them in the timeline as you make them.
A state is the starting point for following states
By default, when you add or modify screen elements, those changes will automatically show up on subsequent states in the flow, unless they are overridden.
You can change anything from one state to another
You can always override changes that are flowed from earlier states. Any and all changes can be overridden, including interactions themselves. For instance, you can change what happens when an add button is clicked in later states so that it does something else, like show a warning that you can't add any more.
The latest change in the flow wins
Changes that you make remain changed for states that come after it in the flow. If you add a button on Start, it will automatically show up in all states unless you remove it in a subsequent state. The button will then be missing in any states subsequent to that one.
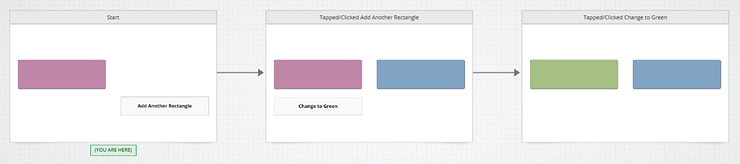
Take this example, where you add a pink rectangle in the Start state, then on clicking Add Another Rectangle you see the first pink rectangle in the second state together with a new blue rectangle. Then, upon clicking Change to Green, the first rectangle is changed to green while the other remains blue. Here is how that would look in the Interactions Explorer:
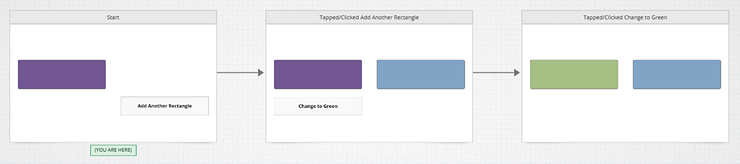
If you now go to Start and change the first pink rectangle to purple, it will only be purple in the first and second states— because the third one overrides that and keeps it green, as shown here:
Prototypes
Take a look at this prototype:
Learn More
Here are some suggested topics: