Sharing Options
Using your prototypes
Overview
In this topic you can find information about how to share what you need on cloud.indigo.design and all the options available when sharing. You can also check out Sharing Your Prototypes.
- What do you want to share?
- Starting point for your share
- New share vs. replace
- Share settings
- Review and commenting options

(a-1) What do you want to share?
Sharing a prototype
When you share a prototype you'll publish the home screen and all its linked screens.
| Action | Looks like |
|---|---|
Click the Share Prototype button in the Project Home. |
![][img-2] |
Select the Share as Prototype option from the Project tab context menu. |
![][img-3] |
Sharing a screenpart library
This will publish all the screenparts in your project.
| Action | Looks like |
|---|---|
Click the Share Library button in the Project Home. You'll see this button when your project only has screenparts. |
![][img-4] |
Display the dropdown options and choose Share Library. |
![][img-5] |
Sharing selected files
| Goal | Action | Looks like |
|---|---|---|
| Sharing specific files or all files | Select them in the Project Homeand click the Share Selected button. |
![][img-6] |
| Sharing a screen and its linked screens | Select the Share as Prototype option from the Screen tab context menu. |
![][img-7] |
| Sharing a screenpart and its inner screenparts | Select the Share as Library option from the Screenpart tab context menu. |
![][img-8] |
Checking the Include linked screens option in the share dialog will include screens outside your selection but reachable through links in the prototype. This way you make sure there are no broken links in your share. When viewing the prototype, use the table of contents in the Prototype Viewer to get to screens that are not reachable through links in your share.
(a-2) Starting point for the share
The starting point is the first screen that viewers of your prototype will see when they access it. You can see its thumbnail marked with a home icon in the Project Home.

If you do not have a starting point set for the selected screens, Indigo will ask you to choose one. You can also change the starting point from the share dialog if you already have one.
To choose the starting point for your prototype, simply click on one of the screens to mark it with the home icon.

(a-3) New share vs. replace
You'll create a new share when:
- it's the first time you're sharing something belonging to the project.
- you want a new URL for your share.
- you want to share a different group of files from what you've shared before.

You'll replace an existing share when you want to create a new version of an existing share. Remember your reviewers already have the URL.

Select one of the items of the list of previous shares to replace and then click the Replace Prototype button.
(a-4) Share settings

| Setting | Description |
|---|---|
| Workspace | Choose between your personal workspaces or any group workspace you're a member of. |
| Name | There's a default name based on the project name. |
| Description | Optional description for your share. |
| Password protection | A share with no password will be available for anyone with the URL. |
| Tags | For community shares, Indigo will make suggestions based on community tags. For private shares, Indigo will make suggestions based on tags from your previous shares. |
(a-5) Review and commenting options
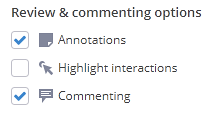
| Option | Description | Default |
|---|---|---|
| Annotations | Displays notes, arrows and callouts from the annotation layer. Doesn't apply to mobile devices. | On |
| Highlight interactions | Displays a highlight for elements with interactions. | Off |
| Commenting | Allows reviewers to post comments on your prototype. Not available for community shares. | On |
If you want to read more about how to use the prototype viewer, see Viewing Your Prototypes.