Adding Animations to Your Interactions
Working with animations
Teaser
Interactions are one of Indigo Studio's main features. They are triggered by user actions and cause changes in a screen. Animations are the result of extending the duration of those changes, so you can make the screen elements do things such as move, grow, or fade out.
At the end of this topic you will have a screen with an animation. You will create a double tap interaction that will make an image grow to full screen size.
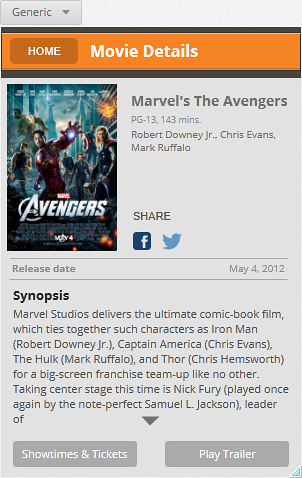
The following image shows what the screen looks like at the beginning and end of the animation.

What You Need
We're starting with a screen containing an image. The screen in the picture belongs the FindFlix sample, which you can find in the Workspaces tab of the Application Menu. Only the image is necessary for this procedure.
In Brief
These are the main steps of the procedure:
- Adding the Double Taps/Clicks Interaction to the image.
- Making changes to the screen as a result of the interaction.
- Animating the transition.
- Running the screen preview.
Step By Step
(a-1) 1. Adding the Double Taps/Clicks Interaction to the image.
Click on the image.
The
Imagecontext panel appears.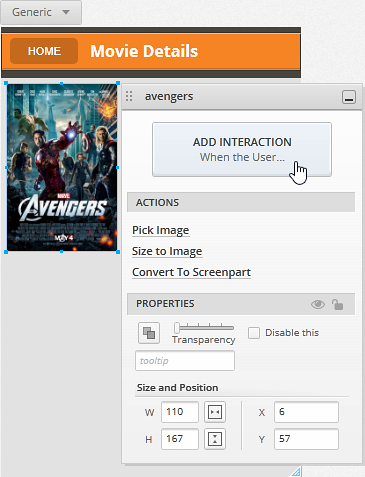
Click the
Add Interactionbutton.The
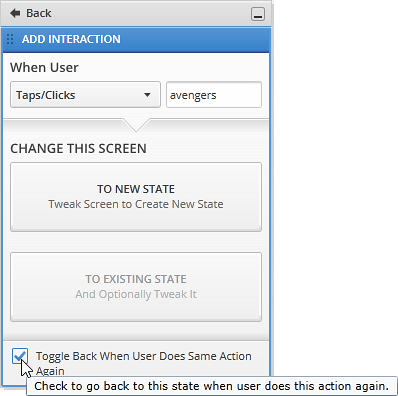
Add Interactionpanel appears.From the
When Userdropdown list, selectDouble Taps/Clicksoption.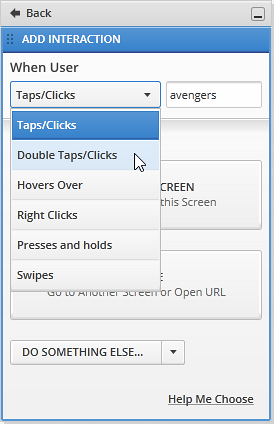
Click the
Change this screenbutton.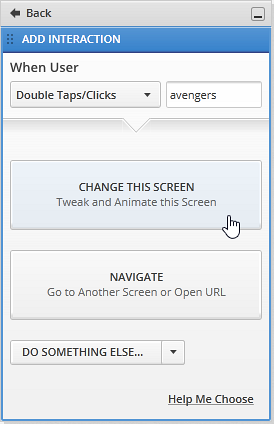
Check the
Togglecheckbox.For Double Taps/Clicks interactions, toggle is turned off by default. This means that when the user double taps/clicks the element for the second time, the screen will not go back to the current state. When Toggle is off, the changes will persist even when the user double taps/clicks the element again. In this case, we want a second double click to make the image small again, showing the rest of the screen content.
Click the
To new statebutton.
Indigo creates a new state for your screen, triggered by the interaction you just defined. An animation shows you this new state in the
Mini Interactions Explorer. You can see this diagram any time by clicking the dropdown button. The current state is highlighted in the diagram.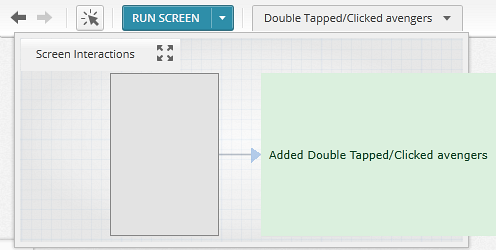
You're now designing the changes that will happen when the user double taps/clicks the image. You can see the state name in the dropdown button.

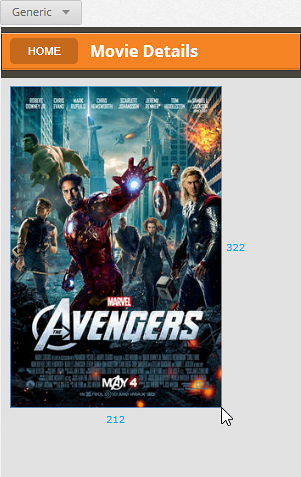
(a-2) 2. Make changes to the screen as a result of the interaction.
Select the image and drag until it reaches the desired size.
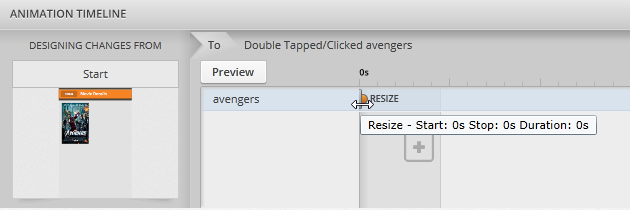
(a-3) 3. Animate the transition.
In the Animation Timeline panel, select the Resize action and drag to change its duration. Start dragging when you see the double-sided arrow.

(a-4) 4. Run the screen preview.
Click on the Run Screen button at the top of the designer.

The preview runs. Double-click the image and you will see it get bigger. Double-click again and the image will go back to its original size.
Learn More
Here are some suggested topics: