Adding Your First Interaction
Working with interactions
Overview
Interactions are one of Indigo Studio's biggest strengths, giving you the ability to generate interactive prototypes very easily. One step ahead of static wireframes or clickable mockups, Indigo lets you explore and create interactive, animated design concepts quickly with little effort.
Teaser
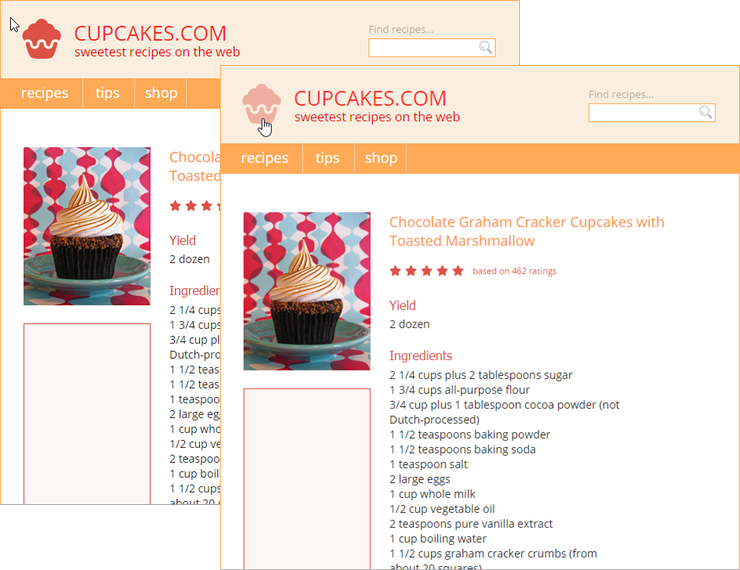
At the end of this topic, you will have a screen with a hover interaction that causes a change in the transparency of an image. The following images show how the cupcake logo changes after the interaction takes place.
What You Need
We're starting with a screen containing an image. The screen in this example belongs to the RecipeLater sample, which you can find in the Workspaces tab in the Application Menu.
In Brief
Here are the main steps of the procedure:
- Adding the Hover Interaction to the image.
- Making changes to the screen as a result of the interaction.
- (Optional) Verifying the new state added in the Screen Interactions Explorer.
- Running the screen preview.
Step by step
(a-1) 1. Add the Hover Interaction to the image.
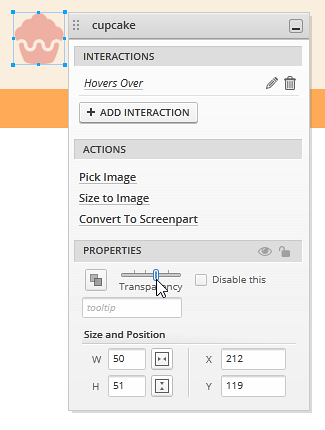
In the Screen Designer, click on the image.
The
Properties Panelappears.
Click on the
Add Interactionbutton.The
Interactions Panelappears.
From the
When Userdropdown list, selectHovers Over.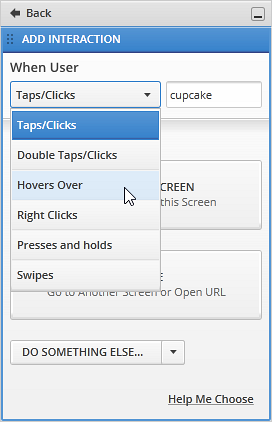
Click the
Change this Screenbutton.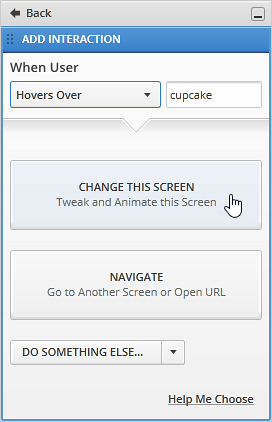
Check out the checkbox at the bottom of the panel.
For Hover interactions toggle is turned on by default so just leave it checked. If the toggle is checked for a hover interaction it means that when the user stops hovering over the element, the screen will go back to the current state. When toggle is off, the changes will persist even when the mouse pointer is no longer over the element.

Click the
To New Statebutton.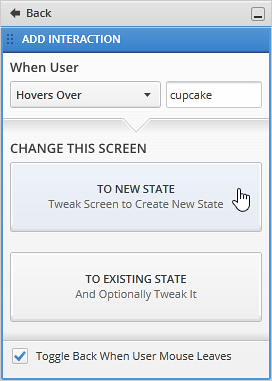
Indigo adds a new Screen Interaction to your screen. An animation at the top of the designer shows you the new screen state. You can see this
Mini Interactions Explorerany time by clicking on the state name. The current state is highlighted.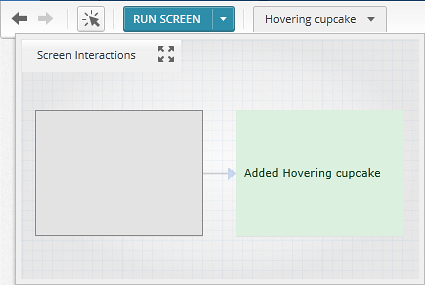
You're now designing the changes that will happen when the user hovers over the image. You can see the state name in the Screen Interactions dropdown.
New states are named based on the user action you picked and the element involved in the interaction. So, if you had an image named cupcake and you added a Hovers Over interaction, the default state name will be Hovering cupcake. You can change this name but if you don't, Indigo will keep it up to date if you decide to change the user action or element name later on.
(a-2) 2. Make changes to the screen as a result of the interaction.
Select the image.
The
Properties Panelappears, showing the properties that can be changed for the element.
Use the slider to set the transparency to a higher value.
(a-3) 3. (Optional) Verify the new state added in the Screen Interactions Explorer.
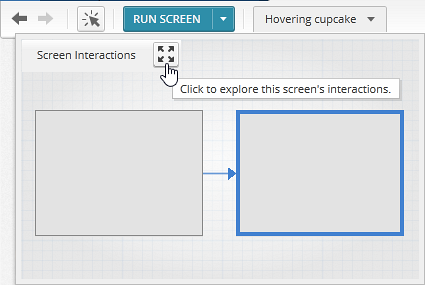
Click the Screen Interactions dropdown.
If the Mini Explorer is displayed, click on the icon to display the full Interactions Explorer.
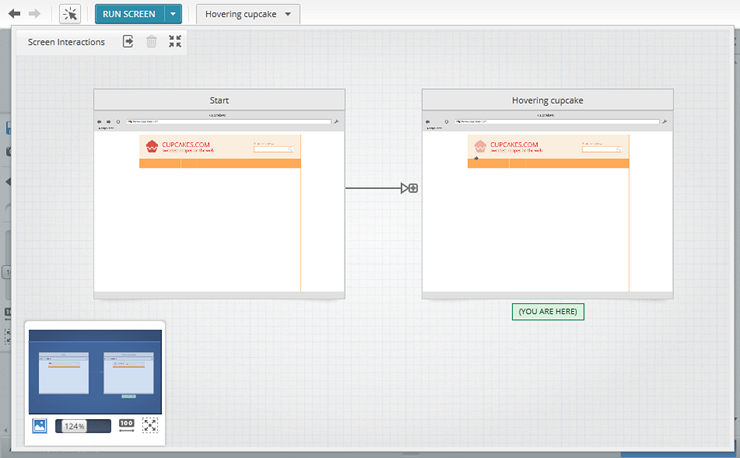
The Interactions Explorer appears and shows a diagram of the interactions and states designed for the screen. You can see you have the Start state and Hovering cupcake state, which you just created. Both states are connected by the interaction added to the image.
For more information, see Understanding Screen Interactions and States.
(a-4) 4. Run the screen preview.
Click on the
Run Screenbutton at the top of the designer. You can also press F5 shortcut to run the prototype.
Perform the interaction.
While the preview is running, hover the mouse pointer over the image. If you set up the interaction settings correctly, you will see the cupcake image change its transparency.
Do you want an animated interaction? If so, see the following topic: Adding Animations to Your Interactions.
Learn More
Here are some suggested topics: