Using Images
Working with UI elements
Overview
Images are present in most designs, and how you use them depends on your audience and on what stage of the design process you're in. You can use something simple, like a background image or a logo, to provide context for your viewers. Or you can include more complex images to develop high fidelity prototypes and get closer to the look of a finished product.
Make sure you use the right size for your images to prevent performance issues. Avoid using images that are bigger than what you need for your prototype, and optimize them whenever you can so you have the smallest file size possible for the quality you need.
These are some of the things you need to know about images in Indigo:
(a-1) Adding an image
To add an image, do one of the following:
- Alt + drag and then type image
- Alt + click to create an image with a default size
- Double click or drag the image from the
Toolboxunder Layout - Drag and drop an image from your computer
- Copy and paste an image
If you add an empty image UI element, use the image picker to select the file from the ones available for your project or from your computer. To open it, click on Pick image or select the image and hit Enter.

(a-2) Supported formats
File formats
- .png
- .jpg
- .gif
Animated GIFs
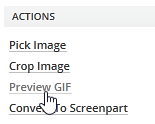
When you add an animated GIF to the design surface, you can preview the animation by clicking the Preview GIF action in the Properties panel.
Check out this sample prototype.
(a-3) Customizing images
There are different ways to manipulate images in your prototypes. You'll do many of them through the Properties panel.

Resizing
You can resize an image by setting height and width in the Properties panel or by dragging, just like any other element.
After you've resized an image, you'll find the Size to image action in the Properties panel to set the image back to its original size.
High resolution devices
When working with iPhone and iPad chromes, Indigo scales the default size of images to fit the resolution of the device. This will give you the best definition for that particular image in that specific device. You get an extra Size for device action in the Properties panel when you change this default setting.
Cropping
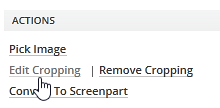
Use the Crop image action and then set the area of the image you want to keep.

After you've cropped an image, you can use the Edit cropping and Remove cropping actions.
Flipping
Flip images horizontally or vertically using the buttons in the Properties panel.
